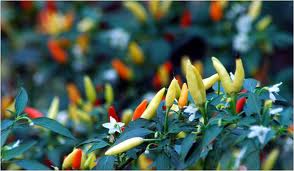
Chili Peppers Farming
This guide is for anyone who has somehow hit on the idea that it would be fun to grow chile peppers. You haven’t grown them before, perhaps you haven’t really grown anything before. After a bit of research on the internet you are completely overwhelmed by the advice and information; not sure where to begin. thechileman website is not aimed at the prefessional growers, yet when we start talking in the guides about vermiculite and heated propagators it may make you wonder whether growing chile peppers is for you afterall. Well don’t be put off, there is an easier way! Yes we like pre-germinating our seeds. We like heat mats, and the drainage advantage of perlite in our soil mix but you don’t have to do all that. Chile plants can be stunningly easy to grow. So here is thechileman’s guide for first time growers or those who don’t want to bother with anything complicated…
Seeds
To grow your own chile peppers you first need seeds. There are lots of fantastic varieties of peppers available to choose from. But for the complete beginner who wants garanteed chile pods and doesn’t want to wait too long to get them, the usually shorter growing time of the Capsicum Annuum’s are probably a good choice, particularly for anyone growing in a cooler climate. You can buy seeds from your local garden centre or take a look at our pod pals section for some recommended seed suppliers. But if you prefer, it really is as simple as popping down to your local supermarket, buying a couple of peppers and scraping out the seeds.
Germination.
This is probably the single most discussed stage of chile pepper growing and the one that offers the most opinions. Now that you have your seeds the trick is to turn them into plants. The first stage of that is to get them to germinate. The main requirements for a seed to germinate are heat, moisture and oxygen. It is possible to germinate your seeds in everything from tissue paper to rock wool cubes, but the easiest growing medium is soil.
It doesn’t matter what you use to hold your soil. Whether it is a propagator or a simple plastic box with some small drainage holes cut into the bottom of it to stop the soil getting water logged. Sow your seeds by placing them on the surface of the soil, then cover them over with more soil but only so that they are just below the surface, perhaps as little as three milimeters. Seeds only have so much energy stored before they need to generate more from light, so plant them too deep and they will run out of energy before they reach the surface.
To get moisture to the seeds you need to water the surface of the soil. Not too much, you want the soil to be moist, not water logged. The final ingredient is heat. At this stage there is no requirement for light so you may find something like an airing cupboard is ideal. Above a radiator, anywhere reasonably warm will do. But bear in mind you don’t want to bake them, and also that too much heat will reduce the moisture content of your soil.
Sucessful germination
Depending upon the variety that you are growing, your seeds will take anywhere from a few days to several weeks to break the surface. You need to be patient but you will be rewarded when they push their way through the surface. While they are seedlings your plants are very sensitive and delicate so best not to touch them. Heat and moisture are still important but key now is the amount of light your seedlings receive. Place your plants in a south facing window or a warm greenhouse if you can.
Transplanting
Chile plants generally produce sets of leaves in pairs. The first set are called the seed leaves, the next set will be the first true set of leaves. Once your seedlings have these you will need to move them to a larger pot to give them more room to grow. Plant pots are cheap and easy to find. It doesn’t matter what size you use, but most people would start off with one about four inches in diameter and gradually move up as the roots start showing through the drainage holes at the bottom. Leaving in a small pot will check the growth of your chile plant. You may be happy with a six inch pot so that your plant can sit on the kitchen windowsill, or you may have your eye on the empty beer keg round the back of your local pub.
Feeding
Another black art during chile pepper growing is fertilizer. Most come with a mix of NPK which is nitrogen, phosphorus, potassium. Too much nitrogen and your plants will be all leaves and no fruit, not enough and your plants may be yellow and withered. But you don’t need to worry about fertilizer if you don’t want to. The correct balance of light, water are really all that the plant needs. As long as your soil is half way decent the plant will be able to get all the nutrients it needs from that.
Flowering
When your plants produce flowers you are in business. This is where the fruit comes from. Again you can read plenty about how best to pollinate your chile plant’s flowers but trust us, this will work – when there are several flowers open on your plant, rub your finger around the middle part to pick up the pollen, and repeat a couple of times for each flower. This will move the pollen to the stamen and start the chemical reaction needed to make the fruit.
Fruiting
If all is well the flower petals will drop off as the green middle part of the flower starts to swell slightly. This is the chile pepper beginning to grow. Depending upon which variety you have decided to grow, the chile pod that is now starting to form could end up like any of these. Keep your plant happy and it will continue to produce fruit well into the autumn and perhaps even beyond.